Synapse Detection
Introduction
A synapse is an essential structure in the nervous system that allows an electric or chemical signal to be passed to another neuron or an effector cell (e.g., muscle fiber). Identification of synapses is important for reconstructing the wiring diagram of neurons to enable new insights into the workings of the brain, which is the long-term goal of the connectomics area. Signal flows in one direction at a synapse, therefore each synapse usually consists of a pre-synaptic region and a post-synaptic region.
This tutorial has two parts. In the first part, you will learn how to detect synaptic clefts by predicting the synaptic cleft pixels on the CREMI Challenge dataset from adult Drosophila melanogaster brain tissue. This dataset is released in 2016. In the second part, you will learn how to predict the synaptic polarity masks to demonstrate the signal flow between neurons using the dataset released by Lin et al. in 2020. The brain sample is collected from Layer II/III in the primary visual cortex of an adult rat.
Synaptic Cleft Detection
This tutorial provides step-by-step guidance for synaptic cleft detection with CREMI benchmark datasets. We consider the task as a semantic segmentation task and predict the synapse pixels with encoder-decoder ConvNets similar to the models used in affinity prediction in neuron segmentation. The evaluation of the synapse detection results is based on the F1 score and average distance. See CREMI metrics for more details.
Note
We preform re-alignment of the original CREMI image stacks and also remove the crack artifacts. Please reverse the alignment before submitting the test prediction to the CREMI challenge.
Script needed for this tutorial can be found at pytorch_connectomics/scripts/. The YAML configuration files can be found at pytorch_connectomics/configs/, which
stores the common settings for model training and inference. Other default configuration options can be found at pytorch_connectomics/connectomics/config/. The pytorch
dataset class of the synaptic cleft detection task is connectomics.data.dataset.VolumeDataset.
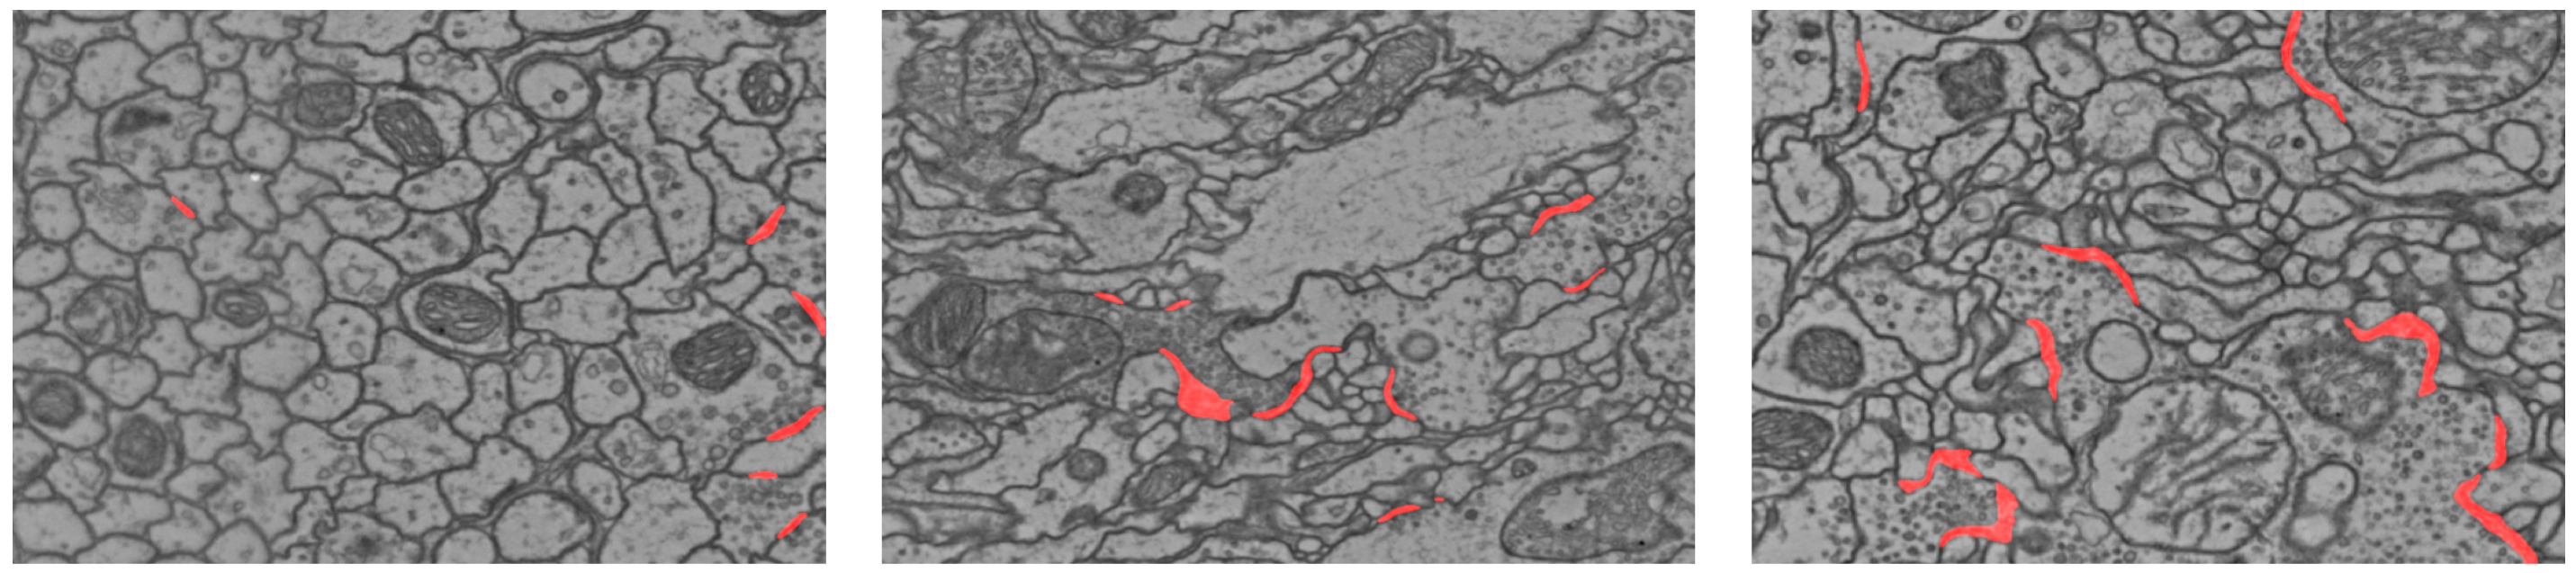
Qualitative results of the synaptic cleft prediction (red segments) on the CREMI challenge test volumes. The three images from left to right are cropped from volume A+, B+, and C+, respectively.
1 - Get the dataset
Download the dataset from the challenge page, or the Harvard RC server:
wget http://rhoana.rc.fas.harvard.edu/dataset/cremi.zip
For description of the data please check this page.
Note
If you use the original CREMI challenge datasets or the data processed by yourself, the file names can be
different from the default ones. In such case, please change the corresponding entries, including IMAGE_NAME,
LABEL_NAME and INPUT_PATH in the CREMI config file.
2 - Run training
For the CREMI dataset that has multiple volumes, our framework can take a list of volumes and conduct training/inference at the same time.
source activate py3_torch
CUDA_VISIBLE_DEVICES=0,1,2,3,4,5,6,7 python -u -m torch.distributed.run \
--nproc_per_node=3 --master_port=1234 scripts/main.py --distributed \
--config-base configs/CREMI/CREMI-Base.yaml \
--config-file configs/CREMI/CREMI-Foreground-UNet.yaml
3 - Visualize the training progress
tensorboard --logdir outputs/CREMI_Binary_UNet
4 - Run inference
CUDA_VISIBLE_DEVICES=0,1,2,3,4,5,6,7 python -u scripts/main.py \
--inference --config-base configs/CREMI/CREMI-Base.yaml \
--config-file configs/CREMI/CREMI-Foreground-UNet.yaml \
--checkpoint outputs/CREMI_Binary_UNet/volume_100000.pth.tar
Synaptic Polarity Detection
This tutorial provides step-by-step guidance for synaptic polarity detection with the EM-R50 dataset released by Lin et al. in 2020. This task is different from the synaptic cleft detection task in two aspects. First, this one requires distinguishing different synapses, while the cleft detection task only needs the binary foreground mask for evaluation. Second, the polarity detection task also requires separated pre-synaptic and post-synaptic masks. The evaluation metric of the synaptic polarity detection results is an IoU-based F1 score. The sparsity and diversity of synapses make the task challenging.
Note
We tackle the task using a bottom-up approach that first generates the segmentation masks of synaptic regions and then apply post-processing algorithms like connected component labeling to separate individual synapses. Our segmentation model uses a model target of three channels. The three channels are pre-synaptic region, post-synaptic region and synaptic region (union of the first two channels), respectively.
All the scripts needed for this tutorial can be found at pytorch_connectomics/scripts/.
The pytorch dataset class of synaptic partners is connectomics.data.dataset.VolumeDataset.
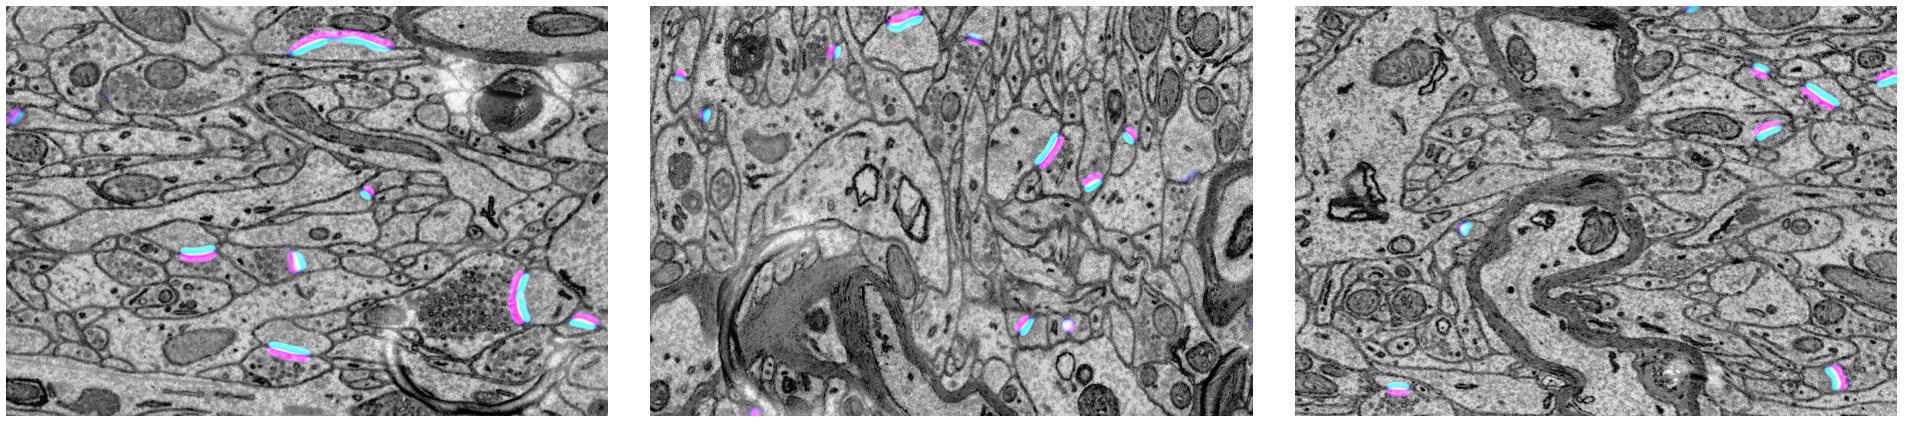
Qualitative results of the synaptic polarity prediction on the EM-R50 dataset. The three-channel outputs that consist of pre-synaptic region, post-synaptic region and their union (synaptic region) are visualizd in color on the EM images. The single flows from the magenta sides to the cyan sides between neurons.
1 - Get the dataset
Download the example dataset for synaptic polarity detection from our server:
wget http://rhoana.rc.fas.harvard.edu/dataset/jwr15_synapse.zip
2 - Run training
The training and inference script can take a list of volumes (or a long string of paths that can be separated by ‘@’) in either the yaml config file or by command-line arguments.
Note
By default the path of images and labels are not specified. To
run the training scripts, please revise the IMAGE_NAME, LABEL_NAME
and INPUT_PATH options in configs/Synaptic-Polarity.yaml.
The options can also be given as command-line arguments without changing of the yaml configuration files.
source activate py3_torch
CUDA_VISIBLE_DEVICES=0,1,2,3,4,5,6,7 python -u -m torch.distributed.run \
--nproc_per_node=4 --master_port=5679 scripts/main.py --distributed \
--config-file configs/Synaptic-Polarity.yaml
Tip
We add higher weights to the foreground pixels and apply rejection sampling to reject samples without synapes during training to heavily penalize false negatives. This is beneficial for down-stream proofreading and analysis as correcting false positives is much easier than finding missing synapses in the vast volumes.
3 - Visualize the training progress
tensorboard --logdir outputs/Synaptic_Polarity_UNet
4 - Run inference
source activate py3_torch
CUDA_VISIBLE_DEVICES=0,1,2,3,4,5,6,7 python -u scripts/main.py \
--config-file configs/Synaptic-Polarity.yaml --inference \
--checkpoint outputs/Synaptic_Polarity_UNet/volume_100000.pth.tar
Note
The path to images for inference/testing are not specified in the configuration file.
Please change the INFERENCE.IMAGE_NAME option in configs/Synaptic-Polarity.yaml.
5 - Post-process
Then convert the predicted probability into segmentation masks in post-processing. Specifically,
we use connectomics.utils.process.polarity2instance() to convert the predictions into instance or semantic
masks based on the downstream application.
6 - Learning exclusive polarity masks
The tutorial shown above predicts three channels independently with binary cross-entropy losses (BCE) using the following model configurations:
MODEL:
  TARGET_OPT: ["1"]
  LOSS_OPTION: [["WeightedBCEWithLogitsLoss"]]
  LOSS_WEIGHT: [[1.0]]
  WEIGHT_OPT: [["1"]]
  OUTPUT_ACT: [["none"]]
INFERENCE:
  OUTPUT_ACT: ["sigmoid"]
Because the three channels are not exclusive, overlap can happen between pre- and post-synaptic masks. Therefore we also provide a config file to conduct standard semantic segmentation with exclusive masks. The main configurations are
MODEL:
  TARGET_OPT: ["1-1"] # exclusive pos and neg masks
  LOSS_OPTION: [["WeightedCE"]]
  LOSS_KWARGS_KEY: [[["class_weight"]]]
  LOSS_KWARGS_VAL: [[[[1.0, 10.0, 10.0]]]] # class weights
  LOSS_WEIGHT: [[1.0]]
  WEIGHT_OPT: [["0"]]
  OUTPUT_ACT: [["none"]]
INFERENCE:
  OUTPUT_ACT: ["softmax"]
The prediction of the non-exclusive synaptic masks can also be converted into instance masks to identify individual
synapse instances using connectomics.utils.process.polarity2instance() with the option exclusive=True.
